Cardboard Kinesis Devices
Prepare for the biggest section of this website (yet)!
XEROX
I started out building devices under the ‘Ultra’ name. Then, I looked up a word
similar to my name or initials in the dictionary and finally settled for the ‘Kinesis’ name. Ultra was
planned to be used as the brand name of the devices I made and ‘Kinesis’ the operating system’s name just
like Samsung and Android. I planned to make the Kinesis OS better than all the existing OSes. At that time,
I was making Kinesis devices (January 2015).
The devices I made were secure. Kinesis OS had also most of the features of Android, iOS and Windows. My cousins
also built devices similar to the ones I made but their businesses were franchisees of mine. One day, I made another
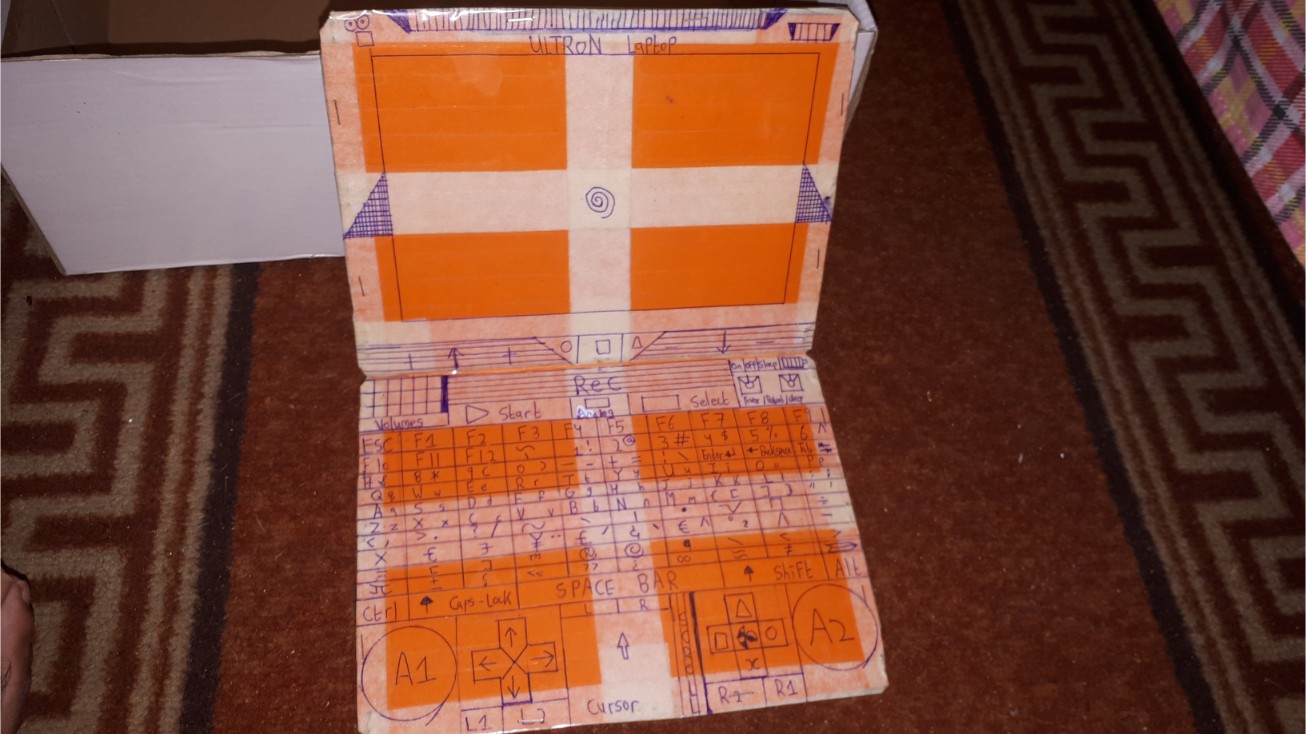
device yet; the Ultron Laptop. It could be used as a tablet too and introduced a new type of processor and newer
technologies. It represented the merging of the Ultra and Kinesis brands. These names also made up storage units such
as the “UltraByte” and the “UltronByte” with the latter being the bigger size of the two. Later on, I finally adopted
the common names (GigaBytes/TeraBytes/ExaBytes). I proceeded in making My Kinesis devices for some time (May 2015).
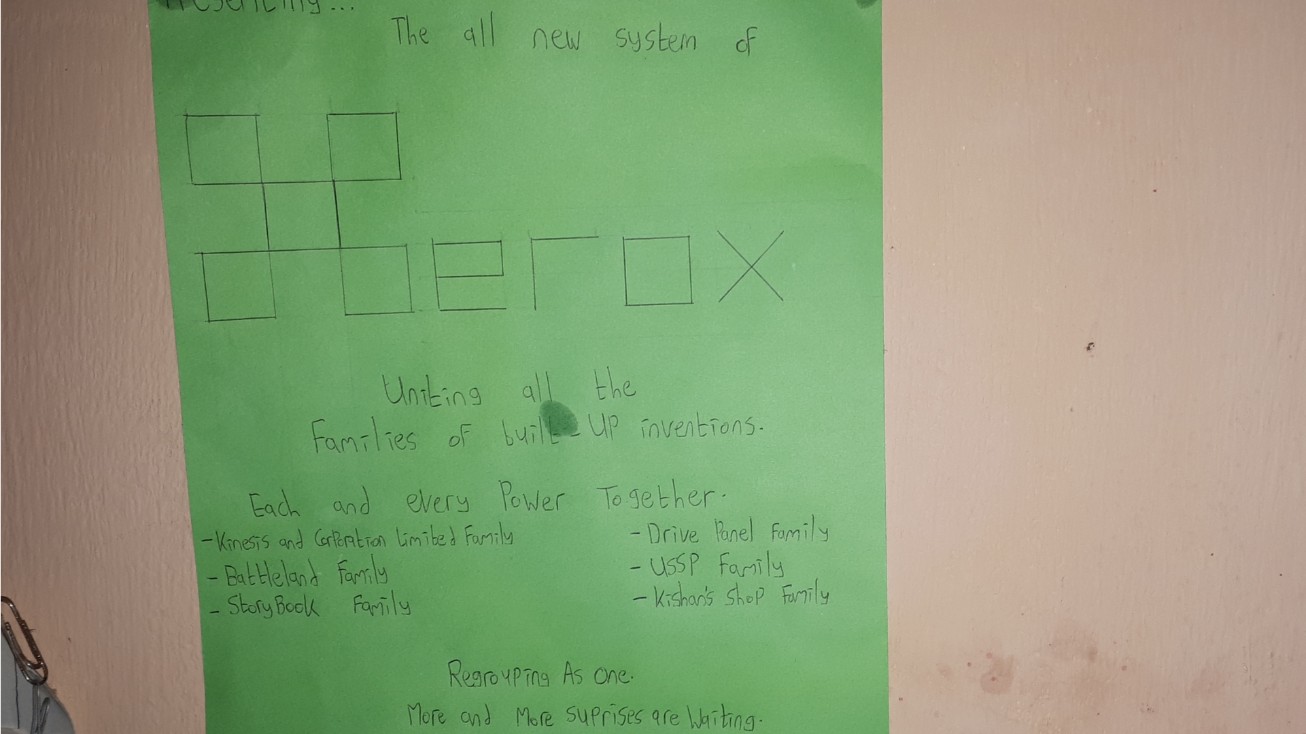
After making enough My Kinesis devices, I started making Kinesis phones. I then developed the XEROX system. Basically,
it was just a business name to replace ‘Kinesis and Corporation Limited’. Xerox Company Unlimited regrouped everything
that I made up from my childhood under its name. Some Kinesis phones became known under this name too such as the
Xerox Ultron Mobile X (XUMX). The final types of processors made for the Kinesis phones were the ‘Molecule Power’.
The Business Plan
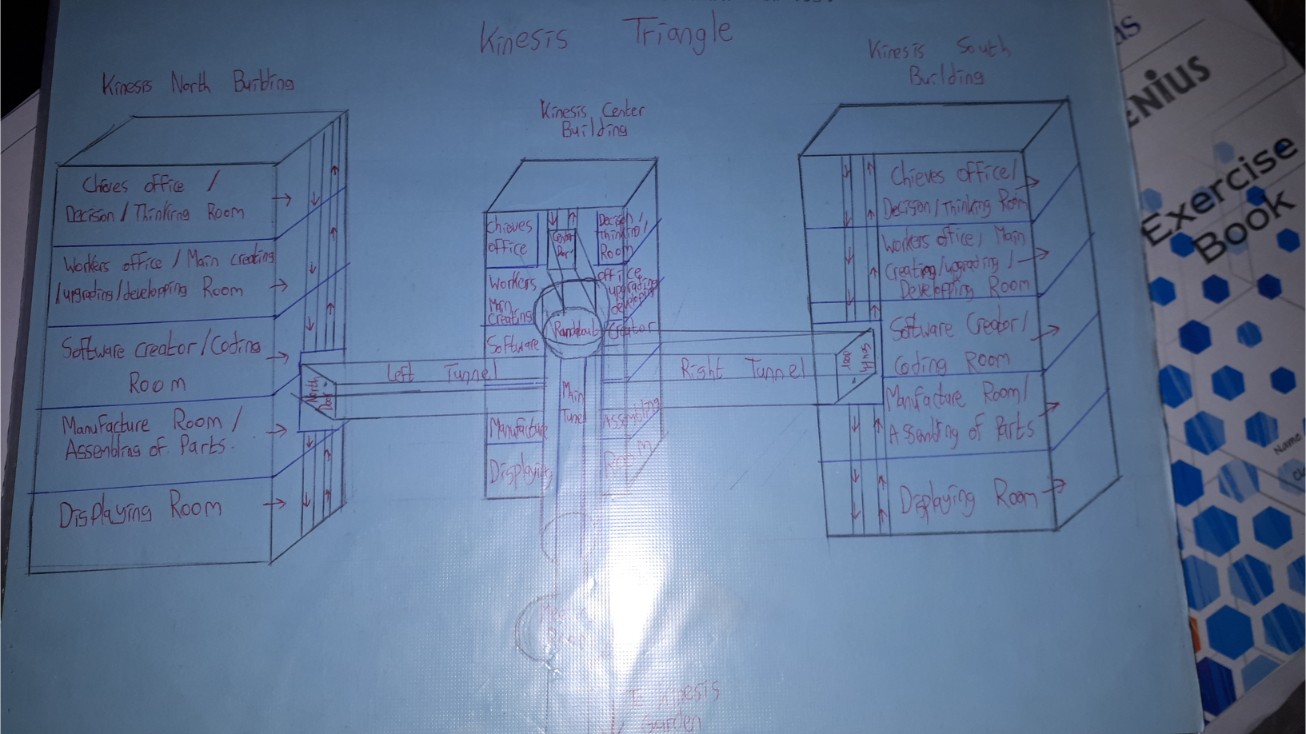
During the middle months of 2015, me and my school friends were assigned to make a fictional business plan. I made mine and talked about the ‘Kinesis and Corporation Limited’ business. At this period of the year, I had already begun making My Kinesis devices. The Kinesis and Corporation Limited had a really big yard. To the sides of the road (which was in the middle), there were a lot of plants maintained in good conditions and several sculptures and artifacts. There was also a huge underground parking. Everyone would initially enter a building (which also contained the conference room) with walls made of glass, leading to 3 pairs of elevators. Each pair of elevators lead to a transparent tunnel, themselves leading to one of the 3 main Kinesis buildings. Yes, everyone needed to enter the buildings from a floor. The building on the left was the Kinesis North, the one straight, the Kinesis Center and the one on the right, the Kinesis South. This naming convention was inspired by ‘Rockstar North’. The basement of these buildings were used as the storage rooms for raw materials and outputs. The Kinesis North was tasked in making My Kinesis devices, the Kinesis South in making consoles, computers and other Kinesis devices while the Kinesis Center just made external accessories for end products of the North and South. The upper floor of these buildings had the offices of the managers and the CEO while the other floors had testing rooms, manufacturing rooms, assembling rooms and programming rooms. These buildings made up the Kinesis Triangle. I also talked about the financial plan and the mission/vision statements of the Kinesis and Corporation Limited in the business plan.
Kinesis Devices
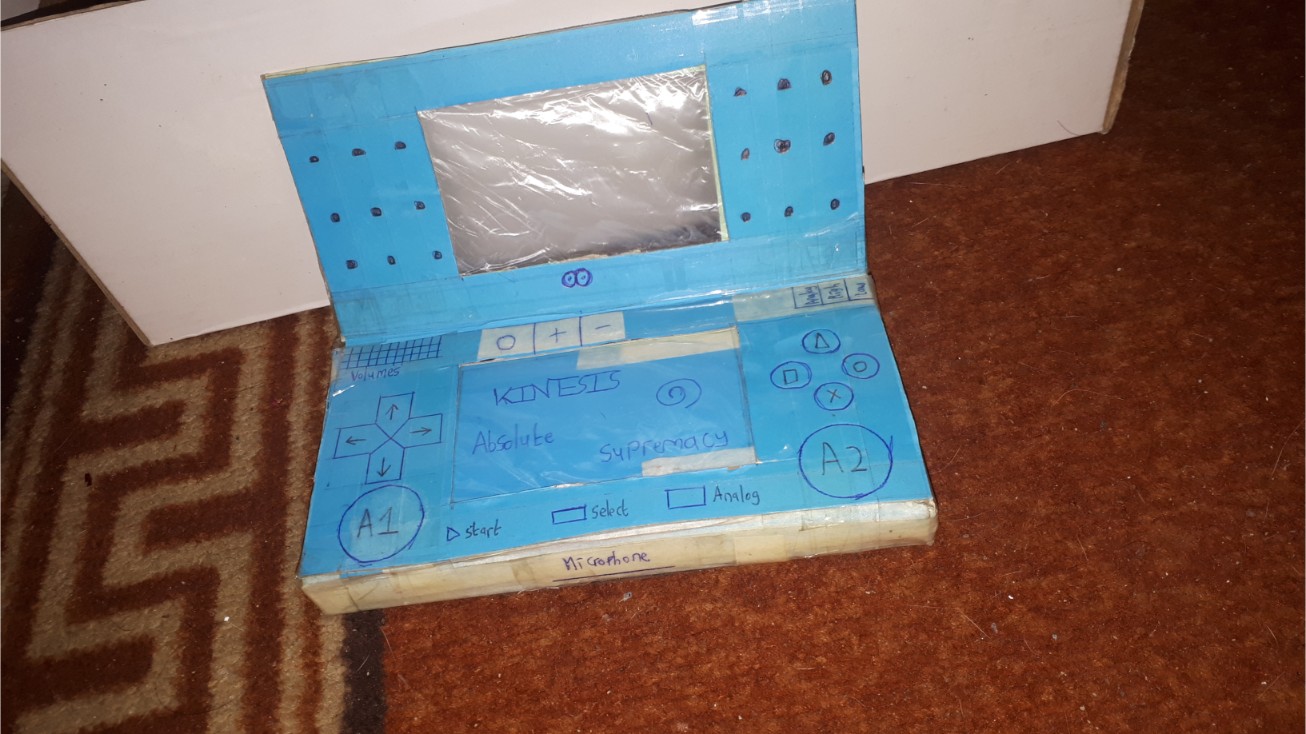
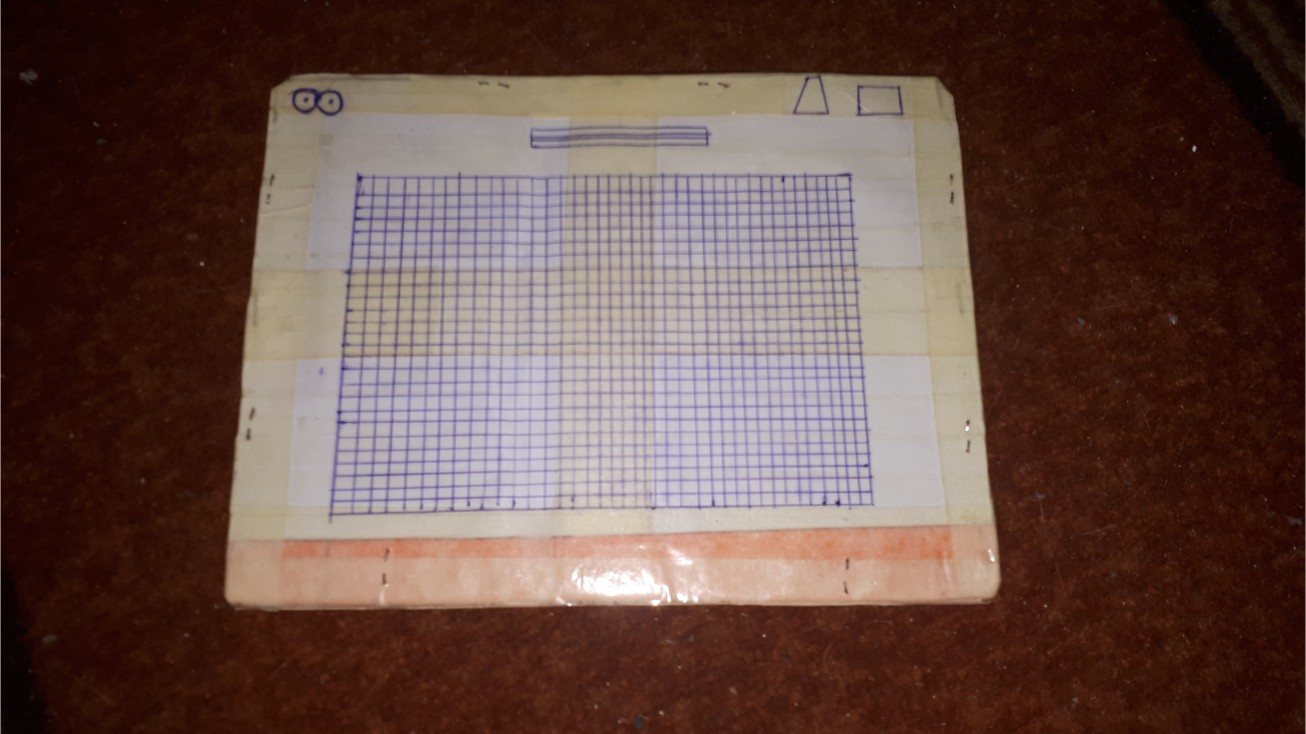
As you know, I had a Nintendo DS. One day I wanted to make something similar
to that. I took some cereal boxes and used them as the raw materials. The device I planned used 4
rectangular equally-sized pieces of cardboard with big rectangles of cardboard cut in their center.
These 4 big cardboard pieces were fixed to form 2 pairs. A big piece of plastic was placed between
each of these 2 carboard pairs so that they would act as fictional screens. Then I would draw buttons
and joystics. Finally, I would place adhesive tape all over so that it was a better end product. The
device could also be used as a phone when it was closed. This was my original idea; a console
when opened and a phone when closed.
This was the ‘Ultra M1-Basic’ but as it was my first Kinesis device, it had a number of flaws.
First, I connected these 2 pairs using adhesive tape and the M1-Basic never actually closed fully like
a Nintendo DS. Then, the measurement of the pieces weren’t so accurate since I was in a hurry to make
that Kinesis device. The buttons were not designed correctly, the adhesive tapes covering the device
weren’t all symmetrical and basically, the device didn’t look well made.
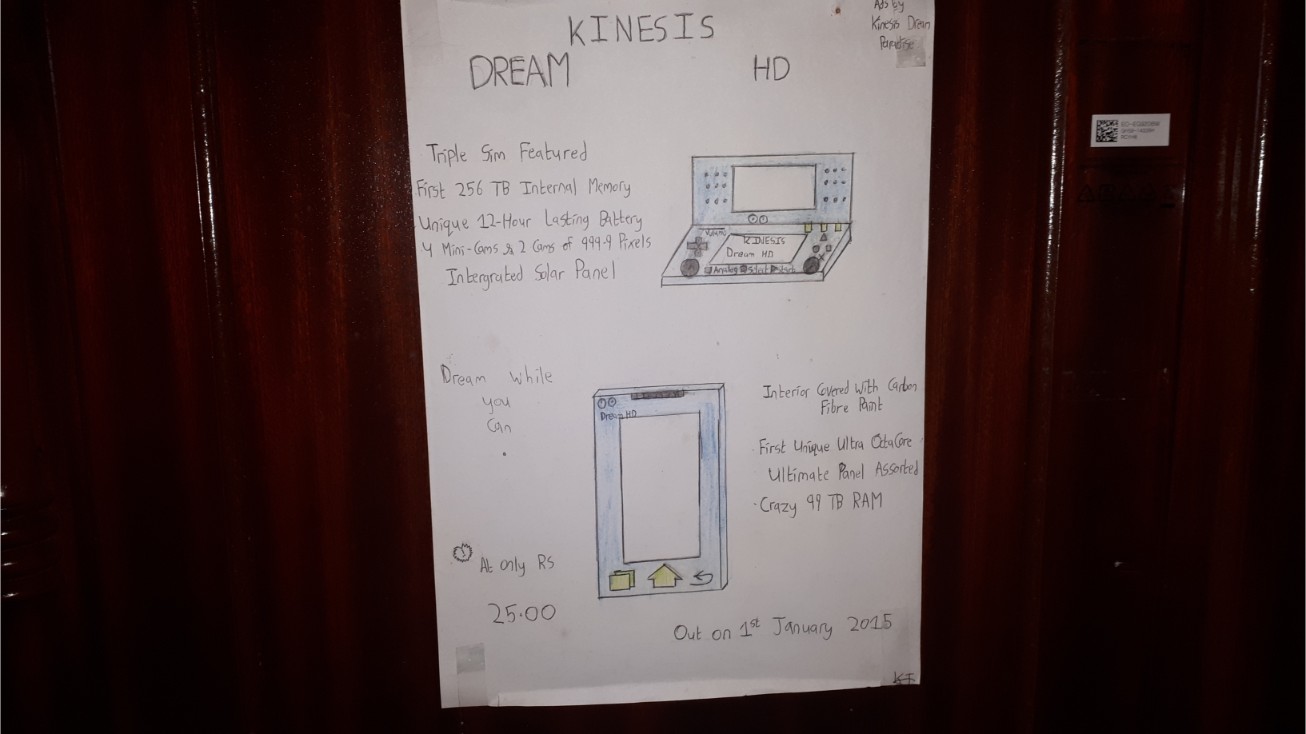
I learned from my mistakes. I bought some colored papers, some pens and other gears to aid me in making
the next Kinesis device; the Kinesis Dream HD. I planned all the dimensions well on paper. Instead of
using 4 pieces of cardboard (I’ll call them layers from now), I used 3 and a box. I made the box too
and basically it replaced the fourth piece of cardboard; the one at the bottom. The box had the same
dimensions of the other layers but had a height of 2-3 cm. It would be a closed box and its main purpose
was to contain the essential hardware of the Kinesis Dream HD. I planned everything well and glued the
colored sheets on the cardboard layers to make them look better. This time, I was more careful in drawing
the buttons and joysticks. I drew a lot of cameras and speakers so that the user had the best experience
in whatever context he/she was using the device. I made a lot of other little cardboard pieces from
whatever excess I had and used them as RAM sticks, internal storage memory, network cards, speakers,
processors and batteries. I glued all of that in the box. At the back of the Dream HD, there were some holes
I made to be used as USB ports, RCA plugs and earphone jacks. To connect the top and bottom layers, I used a
piece of colored paper this time and connected the layers by glueing the ‘connector’ between them. I agree
that it was less solid than the adhesive tape but at least the Kinesis device opened and closed as desired.
Unfortunately, the device didn’t look that good in the end and a big part of that was due to the difficulty
of making holes or cuttings in the layers.
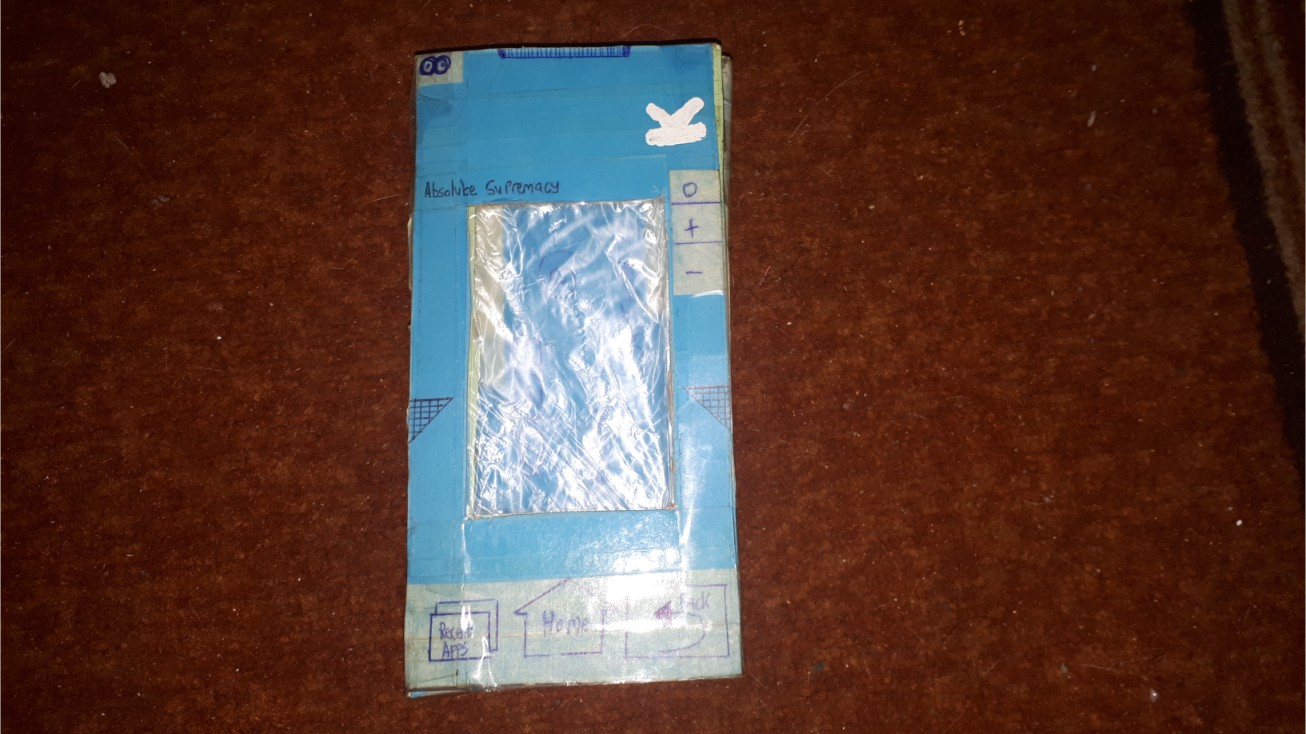
I finally wanted make a flawless Kinesis device. Once again I did my shopping. This time, the Kinesis device
was named the ‘Kinesis Absolute Supremacy’ and I wanted to close the chapter of Kinesis devices with it. I
constructed it in a similar way to the Dream HD. The problem was that the parts inside of its box didn’t hold
well with the glue I was using and I faced a lot of other difficulties. The device failed and I was really
discouraged and didn’t try to make another device for a while. After some months, I was now determined to do
my best and I made better cuttings and managed to glue the hardware correctly. I was pretty satisfied with the
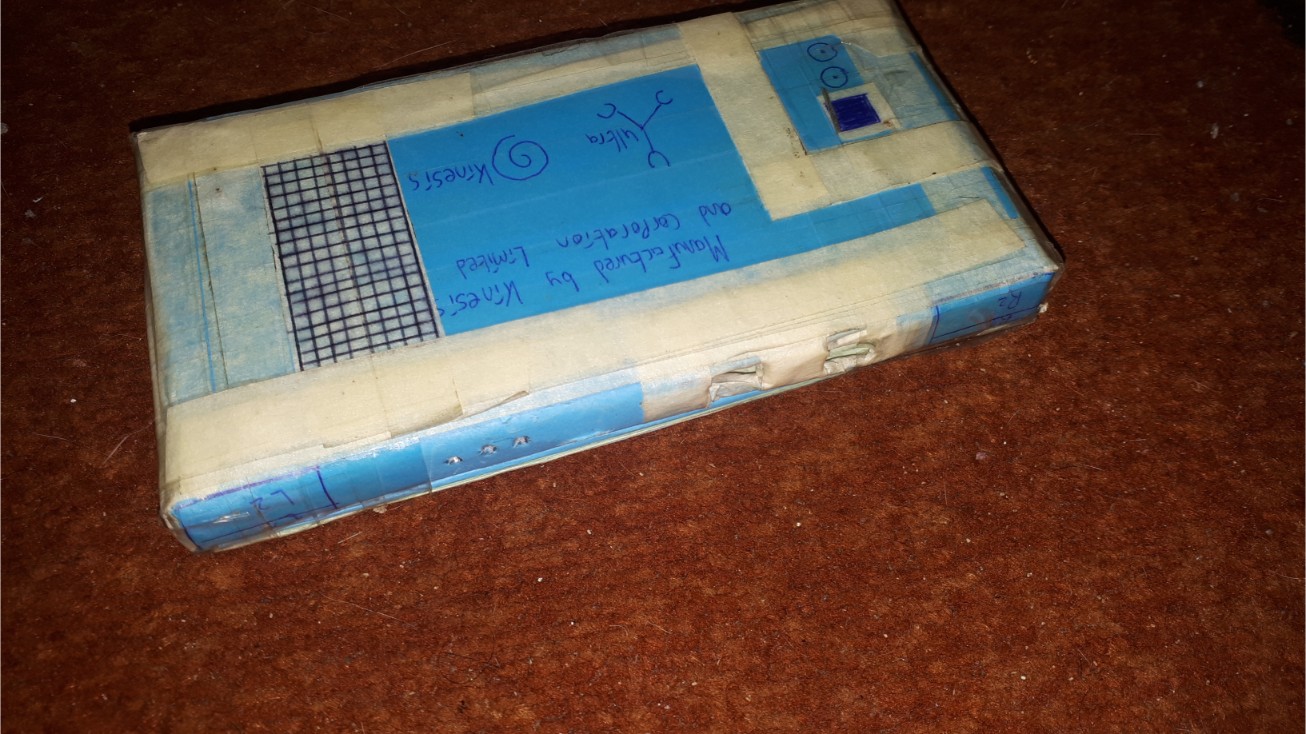
end result. There were also some extensions made for it later. Game cards could be inserted on the left. Those
would be made and inserted in a way so that a game would be displayed on the bottom screen. On the right side
of the device, smaller cards could be inserted; cheat cards. Guess what they were used for. The Absolute
Supremacy was the last and best Kinesis device made.
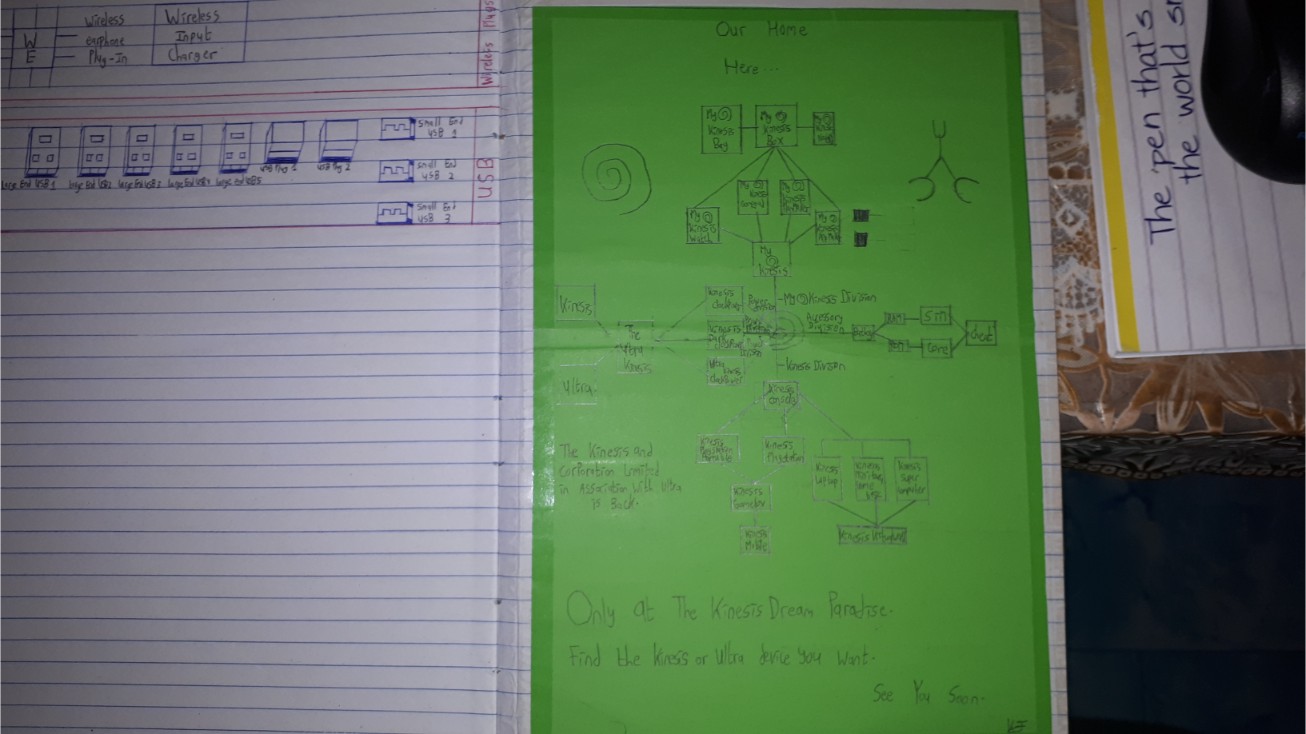
My Kinesis
Kinesis devices were complicated to make and were often either very ugly or practically
destroyed in the end. I got the idea of making something even more original. Initally, I just bought a small
Atlas notebook. The idea was to convert that notebook into a phone. I bought colored paper and glued it on the
notebook. That was the most difficult step since there was a huge risk of cutting off a part of the notebook’s
cover when the excess of colored paper stuck glued needed to be removed. It wasn’t evident to cut the colored
paper based on some dimensions beforehand too. I wasted a lot of notebooks like this and even cried.
Finally, I managed to make a perfect one. My Kinesis devices were distinguished by their version numbers unlike
the other devices which were distinguished by their names. The last one I made was the version 1.7.5.
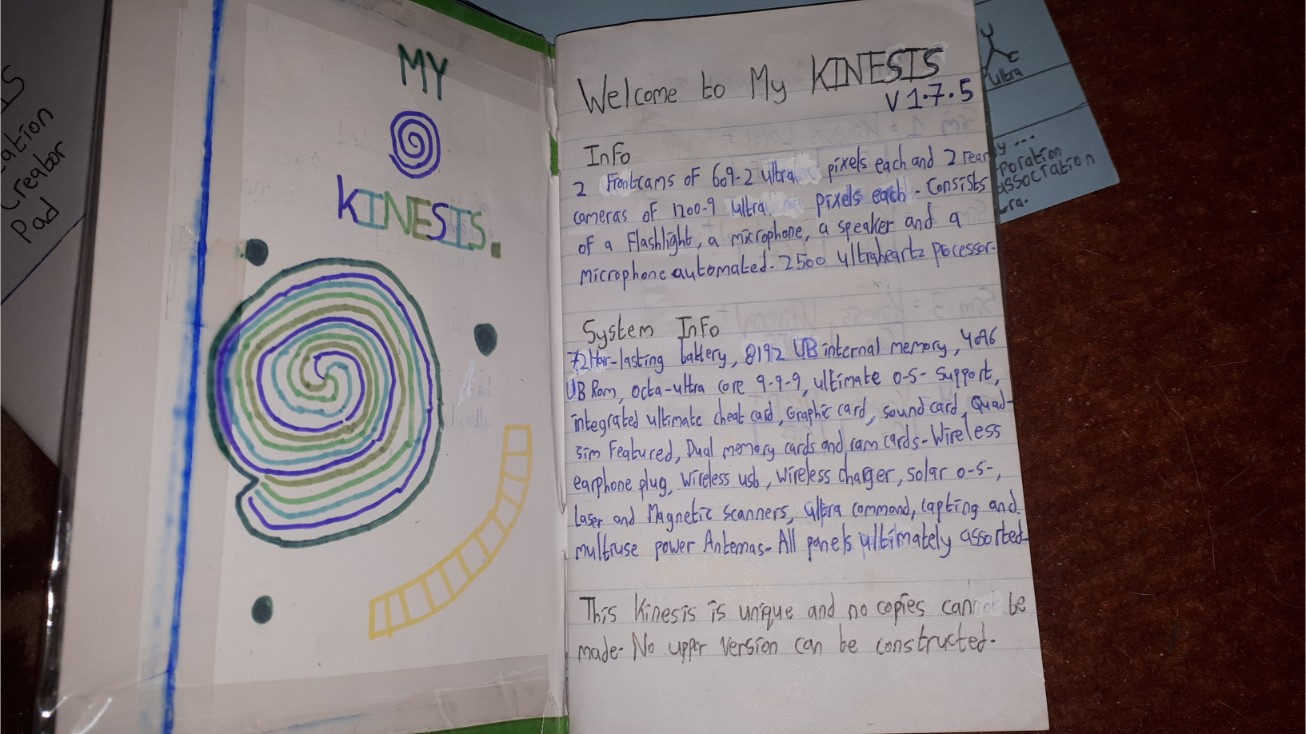
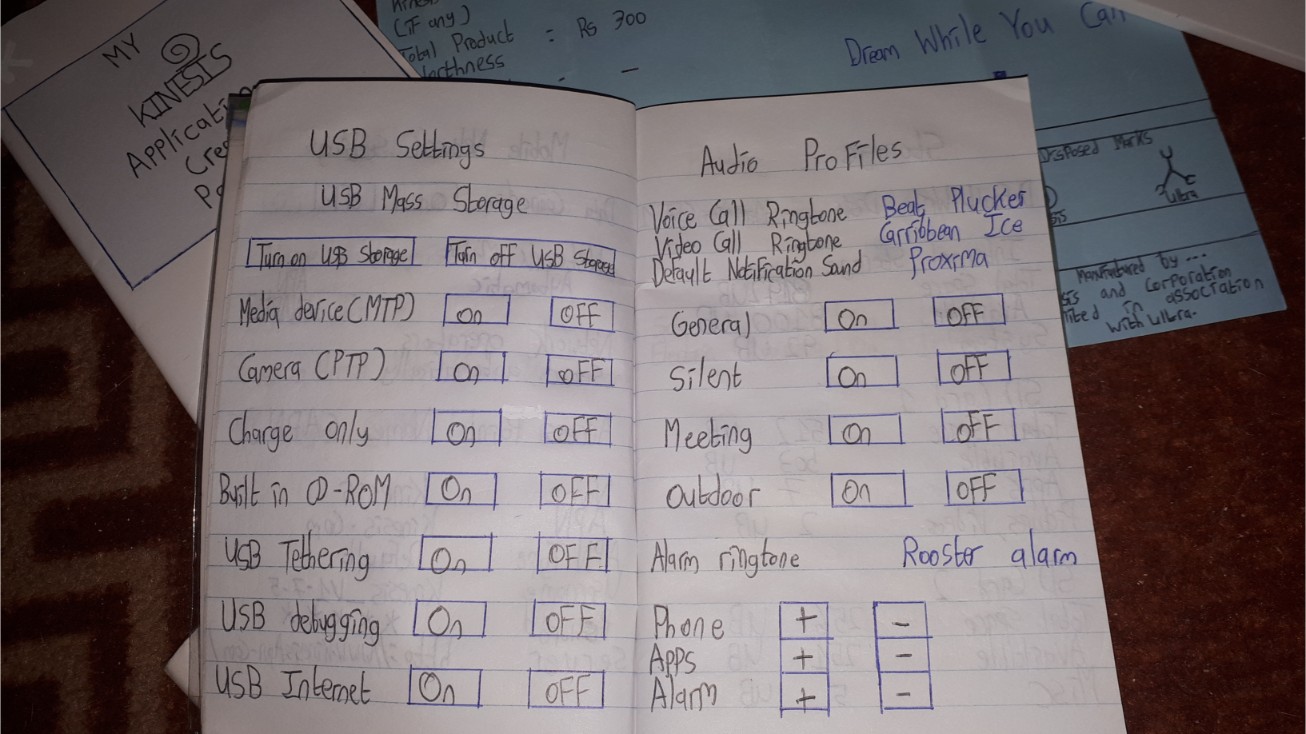
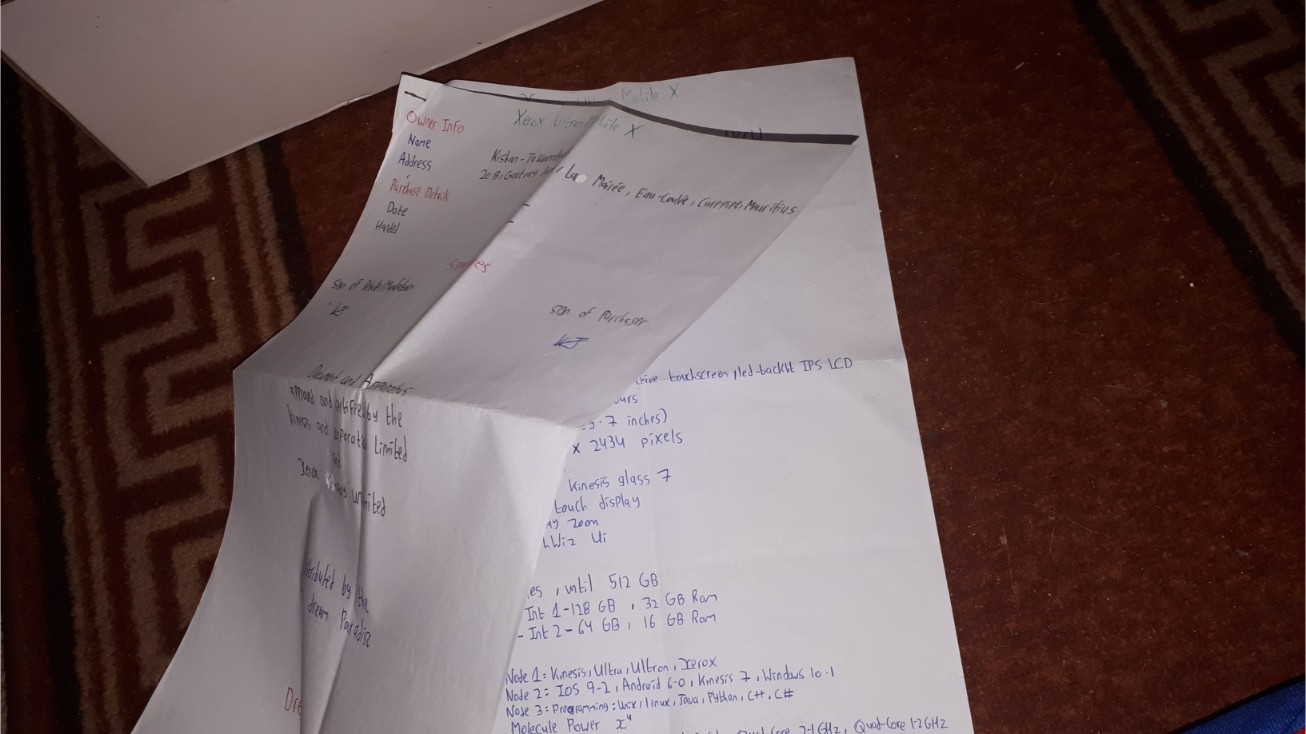
My Kinesis devices had their cameras, speakers and microphone drawn on their covers. They were also covered
with some plastic. Their first pages were usually filled with information about them and the idea was to
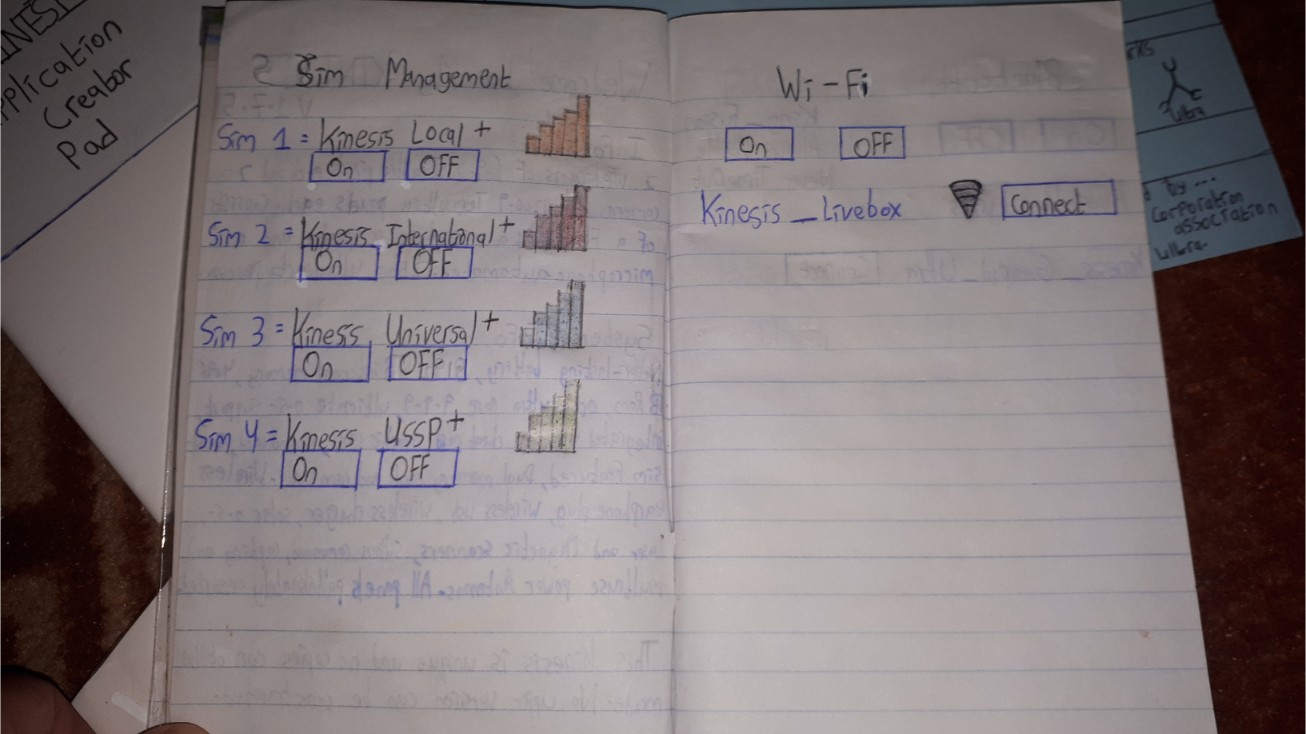
write and draw the screens of apps on each page. For example, to represent the settings app, each page would
be used to represent one option (WiFi, Bluetooth, etc…) and each time an app would be installed for instance,
a record of it would be made under the apps page (Android style). Making pages sure took some time but it
was really worth it afterwards. The last pages of the My Kinesis device had drawings to represent the inner
hardware such as the processor and RAM but also ports (USB, HDMI).
The only issue was that there was the possibility of running out of pages while adding new apps. Bigger and
larger notebooks were used but eventually, a solution was found. Complementary devices were made for these
My Kinesis devices, using a similar format. Simply, another notebook could be used and named as an extension
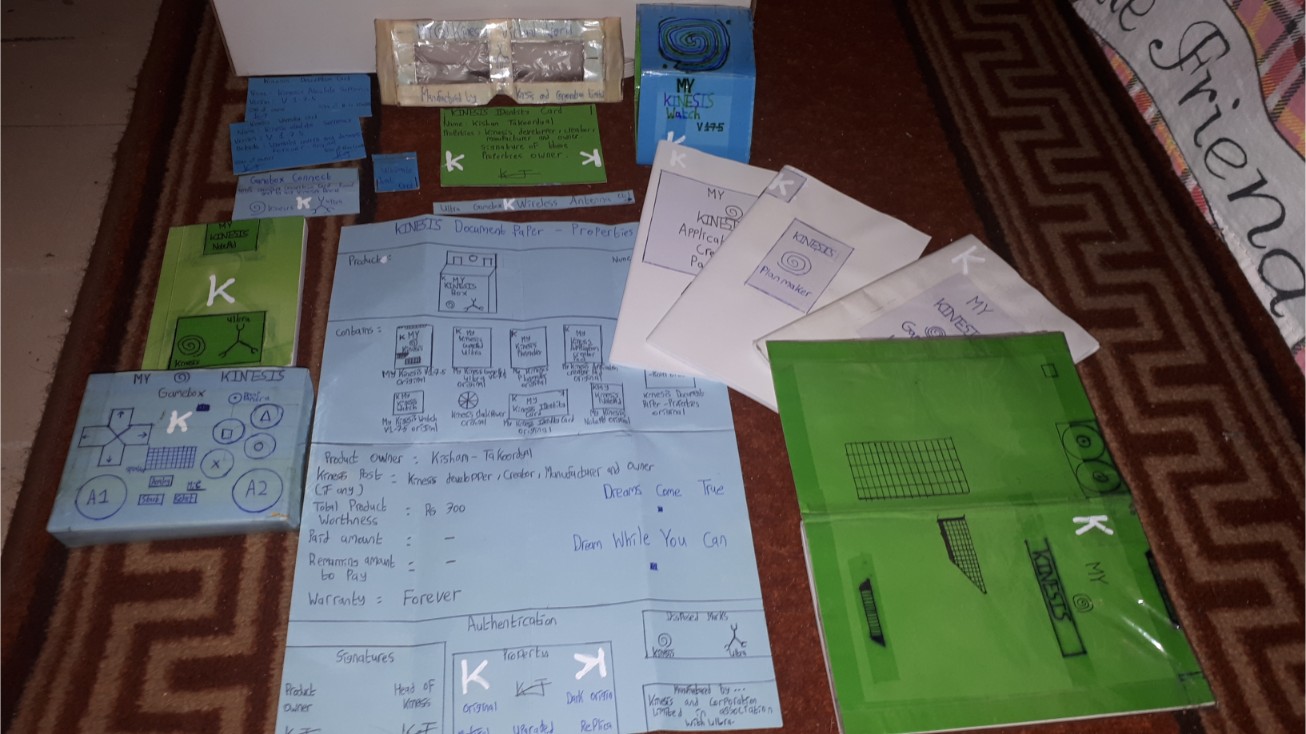
for a particular device. Other similar devices include the gamepad, the planmaker and the application creator
pad. When these were used along the My Kinesis device, only essential or most used apps could be kept on the latter.
The gamepad could be used to keep a library of games, the planmaker to design things and the application creator
pad, to program apps.
A lot of other accessories were made for the My Kinesis too. There’s the gamebox which is used like a controller
for playing games. Of course, the games would be on the My Kinesis device or on the gamepad. A little card was
all that was needed to pair it with the device. The My Kinesis watch was the equivalent of a smart watch. The
Kinesis Virtual World was a VR headset to again, pair with a My Kinesis device.
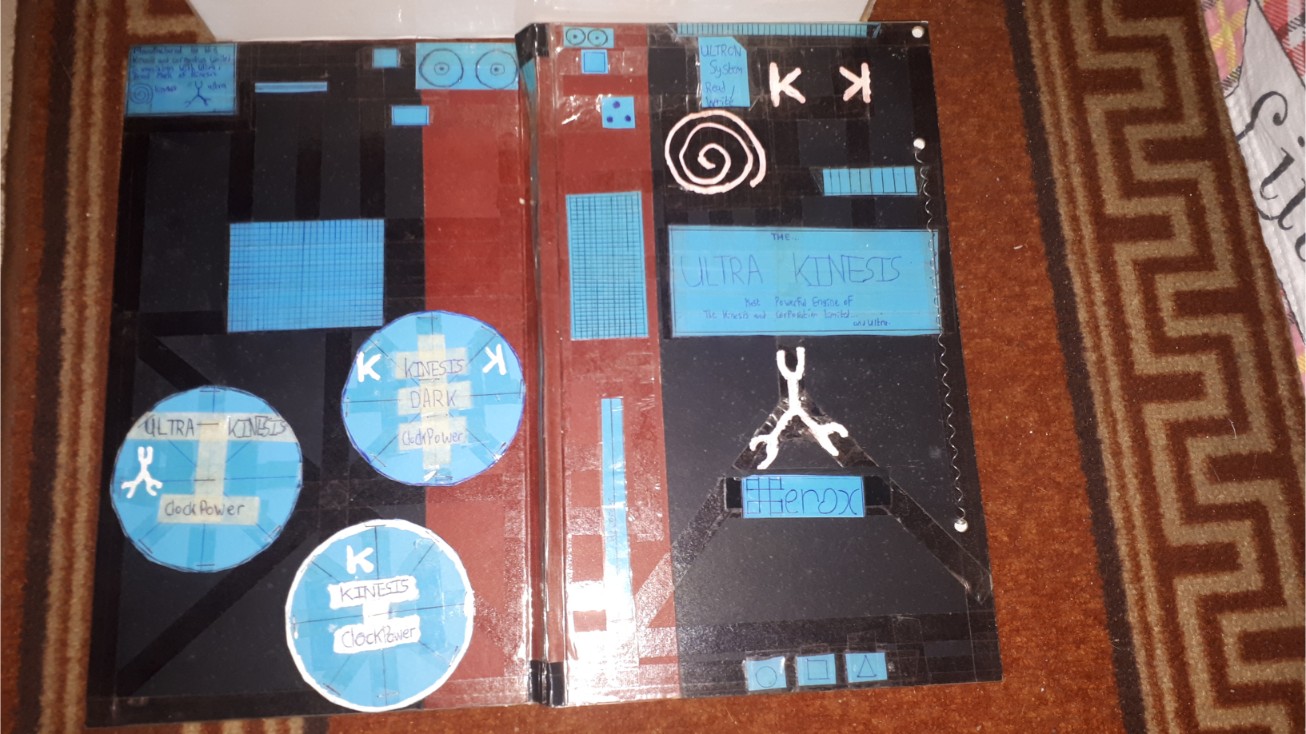
Clockpowers
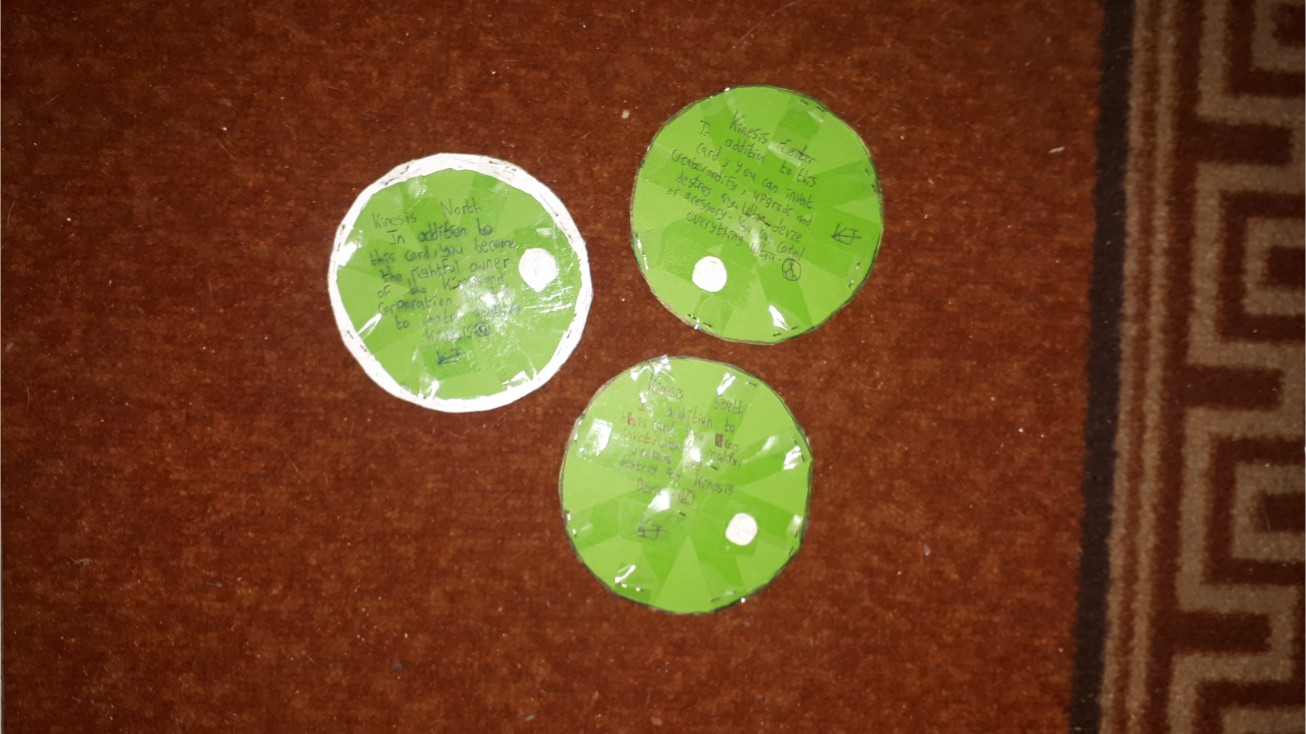
As I mentioned some words above, there were 3 Kinesis towers (North, Center, South).
Well, 3 circular pieces of cardboard were made. Each one of them gave the holder some power in the Kinesis
and Corporation Limited business (XEROX Company Unlimited was created when Kinesis Phones had just started
being made). The first one, the Kinesis Clockpower, gave its holder ownership of the Kinesis North along
with all the rights on Kinesis devices. The Ultra Kinesis Clockpower and the Kinesis Dark Clockpower had
similar properties but instead acted on the Kinesis Center and Ultra devices, and on the Kinesis South
and My Kinesis devices respectively.
When XEROX Company Unlimited saw the day, another My Kinesis device was made. It was way larger than its
predecessors and had a lot of pages. It was even more powerful than other My Kinesis devices and no copies
of it or no device more powerful than it could be made. It was the fourth Clockpower. Its holder got
complete control and ownership of the XEROX Unlimited Company and on the Kinesis Dream Paradise (my room).
Kinesis Phones
I made more Kinesis phones than all other inventions grouped. There were 3 generation
of Kinesis phones I made, each better than the previous. Some months after stopping to make My Kinesis devices,
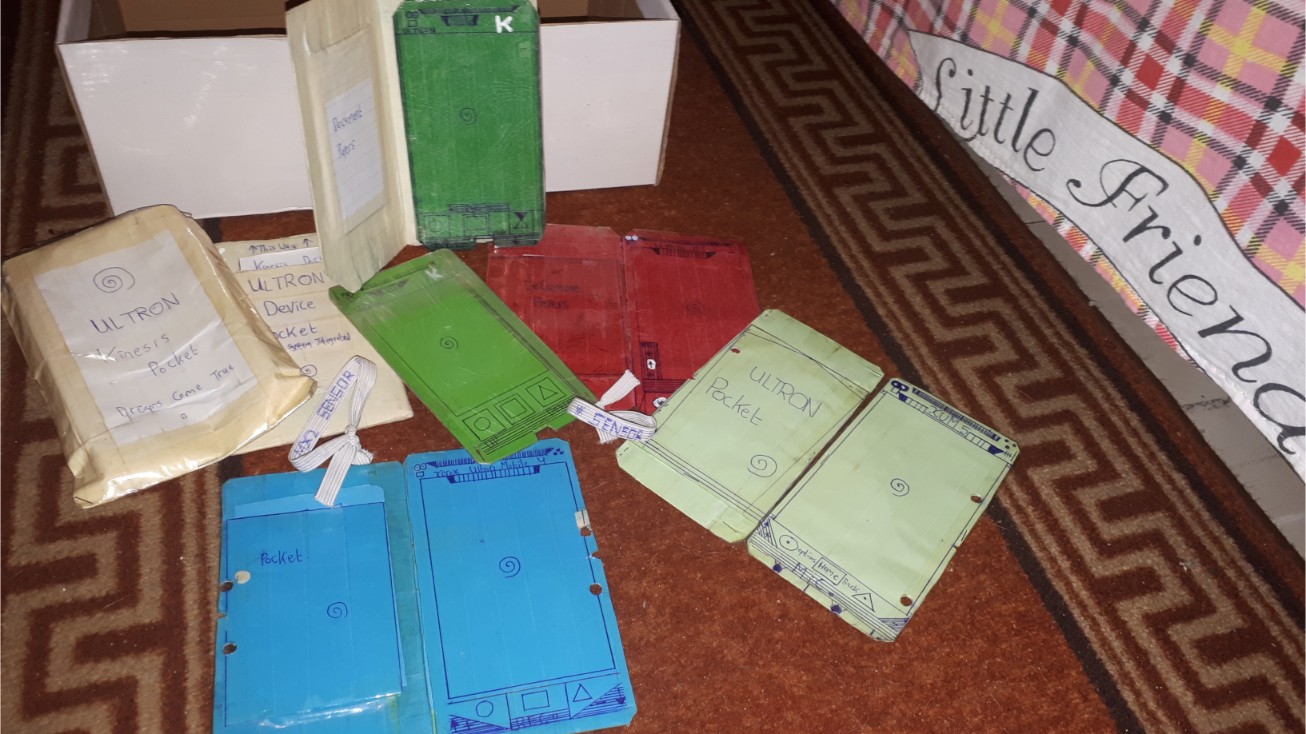
I tried to make a simple phone. The first one was the Ultron Mobile 1. It had a small screen, capacitive buttons
and big bezels. It had twin rear and front cameras, and a big speaker though. It had 2 power buttons at the back.
The ways that these were pressed triggered specific events. Volume could be changed by swiping left or right on
the phone’s front bottom chin. The phone was made using 2 pieces of cardboard, some colored paper and was covered
by some plastic. Then I made a little pocket to keep it in. The Ultron Mobile 2 was made from thick strata papers
and the screen and speakers were bigger than their predecessors. This time the phone was covered by adhesive tape.
I also made a flip cover for it which could be opened for some 270 degrees. The Ultron Mobile 3 was the worst of
the bunch. It consisted only of some sheets of colored paper (no cardboard) and in trying to introduce a new
design, made everything worse. Sure, the screen was larger, but the earpiece and volume swipe pads were moved
on the screen, which wasn’t a rectangle now. It was worse than notches. The Ultron Mobile 3 made one with its flip
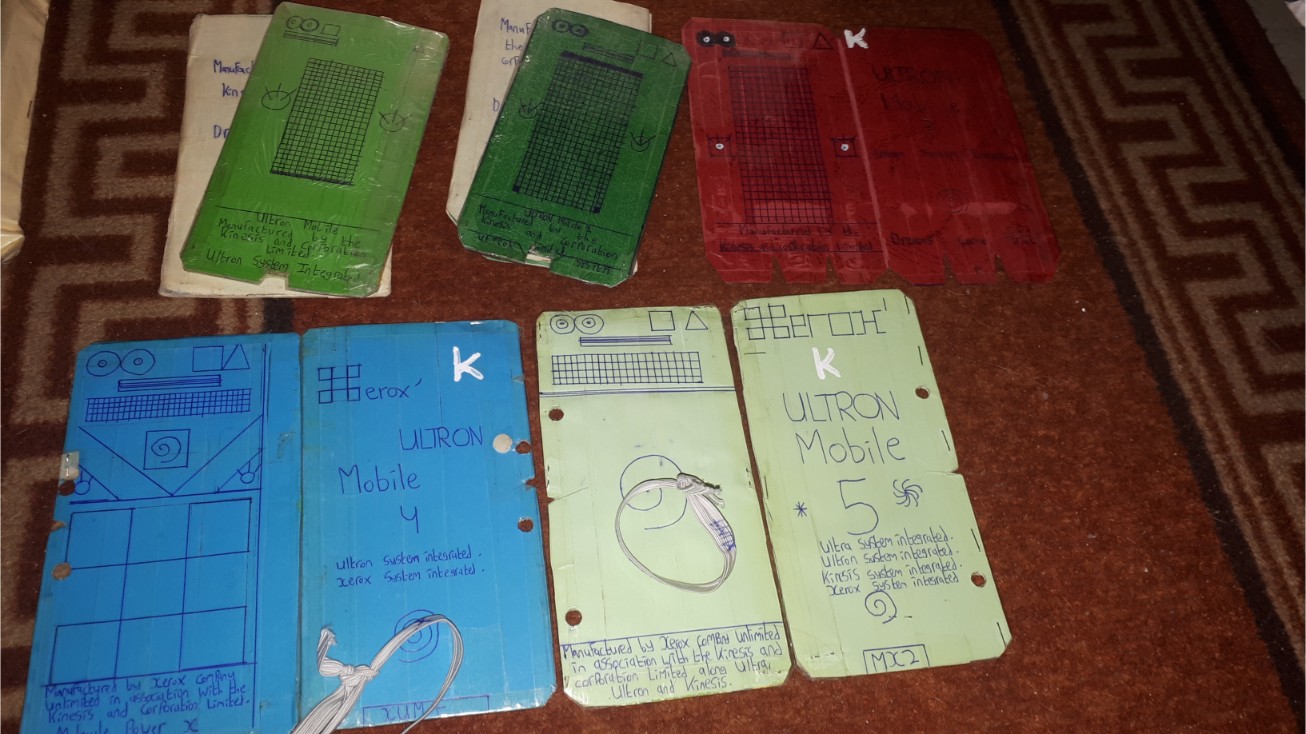
cover which made the latter more flexible and easy to make. When the Ultron Mobile 4 came by, I decided to make
it officially associated with XEROX. The phone had a big rectangular screen and the volume swipe pads were moved
near the capacitive buttons. It also followed the flip cover design introduced by the Ultron Mobile 3 but this
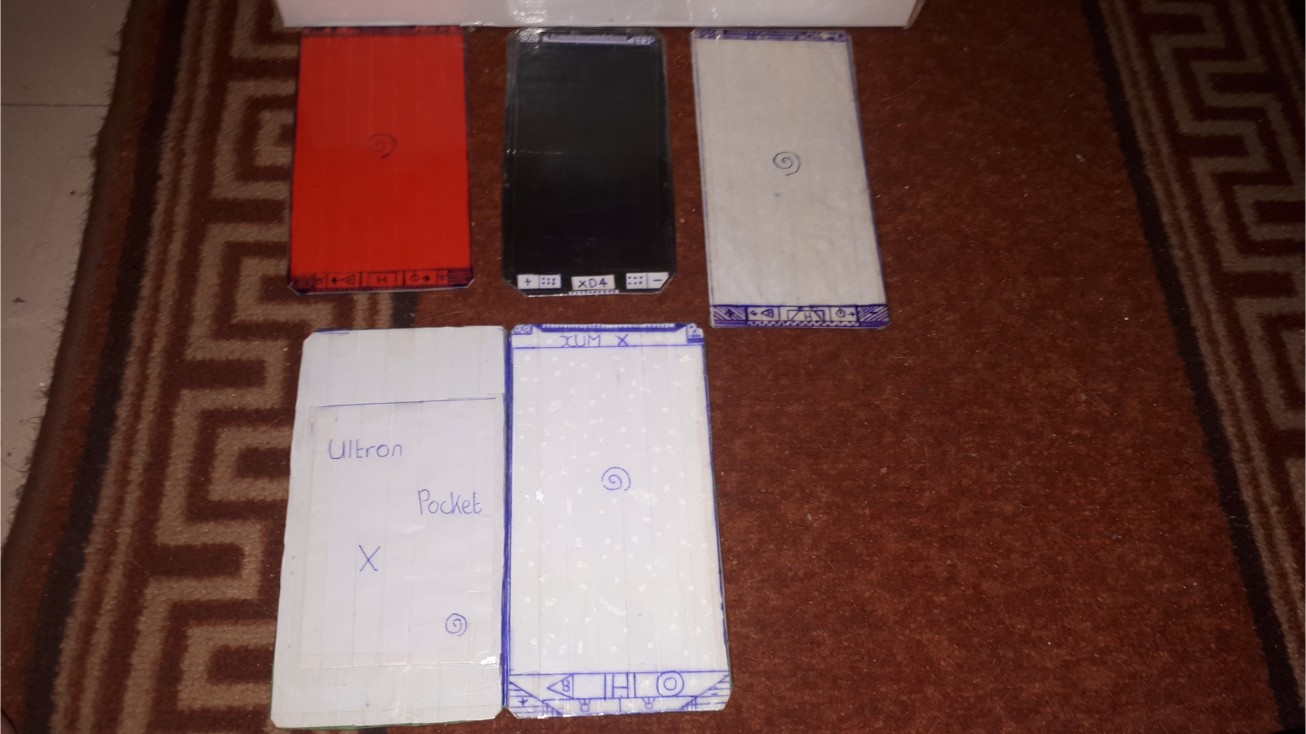
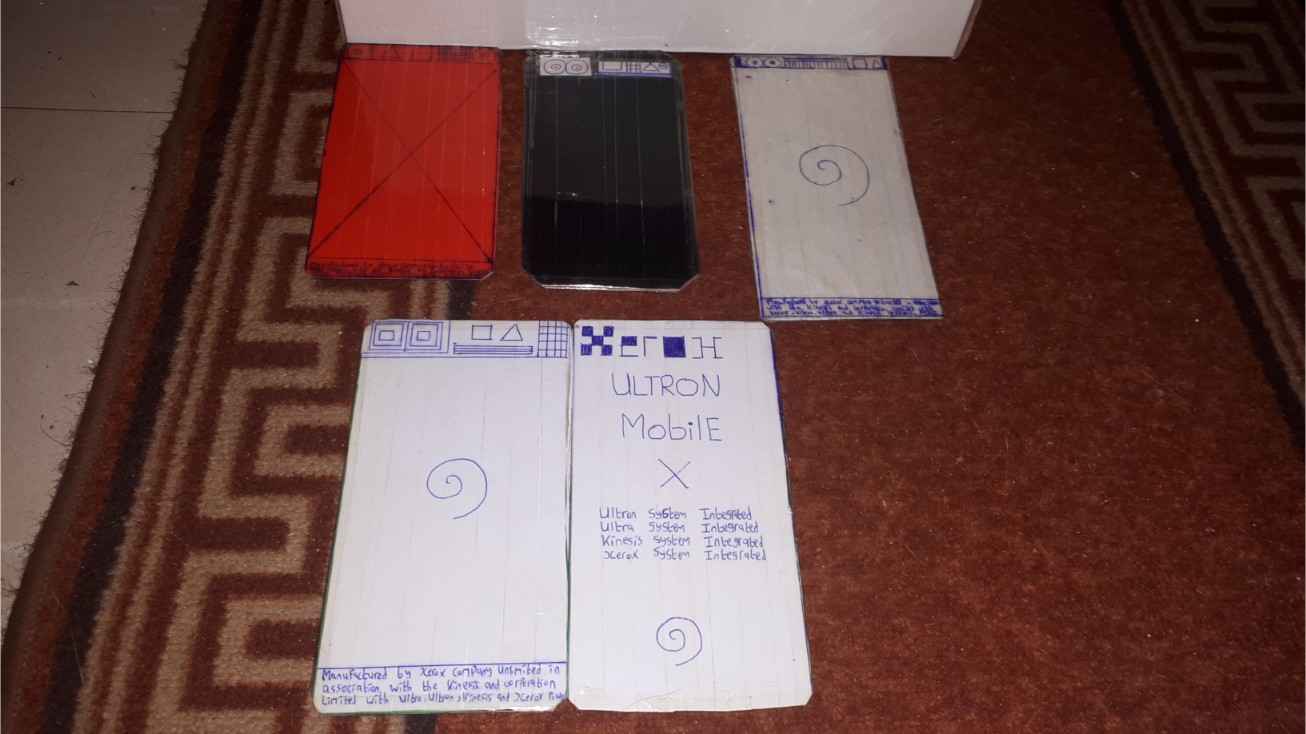
time, the phone was made of more layers of cardboard. The Xerox Ultron Mobile 4 had a unique look on its back too
but more importantly, it was the first device to implement the Molecule Power processor! I felt that some of the
looks of the Xerox Ultron Mobile 4 weren’t right though, and following the footsteps of XUM4, I made the Xerox
Ultron Mobile 5. The Xerox Ultron Mobile 5 moved the power buttons to the front and tried to simplify the design
of the previous phone but I continued to feel that it had some flaws. The XUM5 was powered by the Molecule Power
2 processor. The XUM4 and the XUM5 also introduced a flexible wrist strip that could be used to measure heartbeats
or used in some games. In case you’re wondering, the dual circles represented cameras, the big squares, the
flashlights, the triangles were the projectors, the grids, speakers and the thin rectangles, scanners.
After some time, I resumed making Kinesis phones. First, I wanted to end the line of Xerox Ultron Mobile devices.
The last one was the Xeron Ultron Mobile X. It closely looked like the XUM5 but it was bigger. The bezels were
minimimized, the screen was made bigger and it had a clean look. By the way, the little things at the front right
top side of phones were sensors. I didn’t really have complaints with the XUMX except for its square cameras but
it was the last of the lineup from the first generation. The next ones were the Xerox Dream phones. All Kinesis
phones follow closely the previous one but are probably more powerful or, just introduce a new layout or new
features. The Xerox Dream 1 and 2 are not in the above pictures. They were relatively small phones and didn’t have
flip covers. The XD1 was gifted to my grandmother and the XD2 as a prize for my cousins for something I organized.
The Xerox Dream phones each introduced something changing the regular layout or were different in the materials
they were made of. No Xerox Dream phone had flip covers. The Xerox Dream 3 was the largest Kinesis phone ever made
and closely looked like the XUMX. The major differences were that the XD3 introduced a lot of new sensors and
instead of the regular colored papers, used tracing paper. The last factor made the phone light and its screen
was the best of all the Kinesis Devices since you could sense the tracing paper moving on sliding your finger
on the screen. The Xerox Dream 4 was simpler and used layers of x ray films instead of the regular colored papers.
Back to colored paper, the Xerox Dream 5 looked like the XD3 but was shorter in length, had a bigger screen-to-body
ratio and its twin rear cameras were on each end so as to capture a wider shot. It was the last of the Xerox Dream
phones.
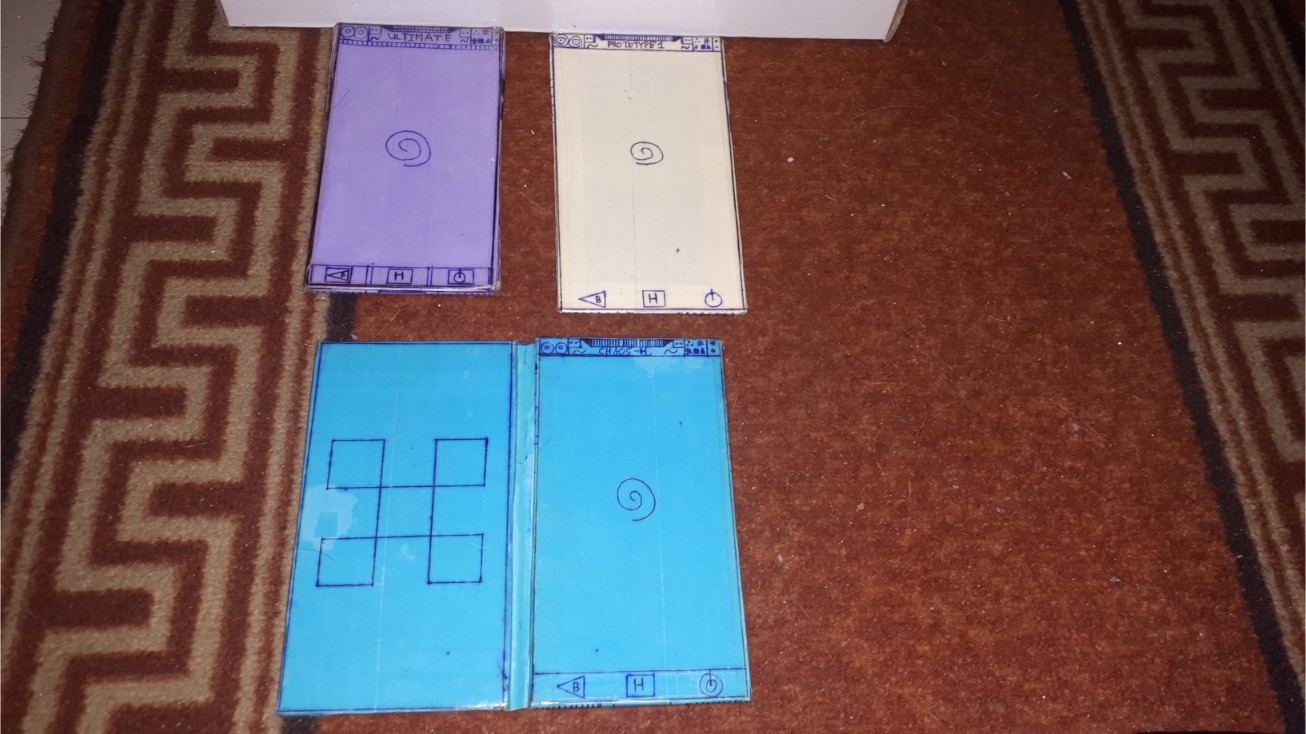
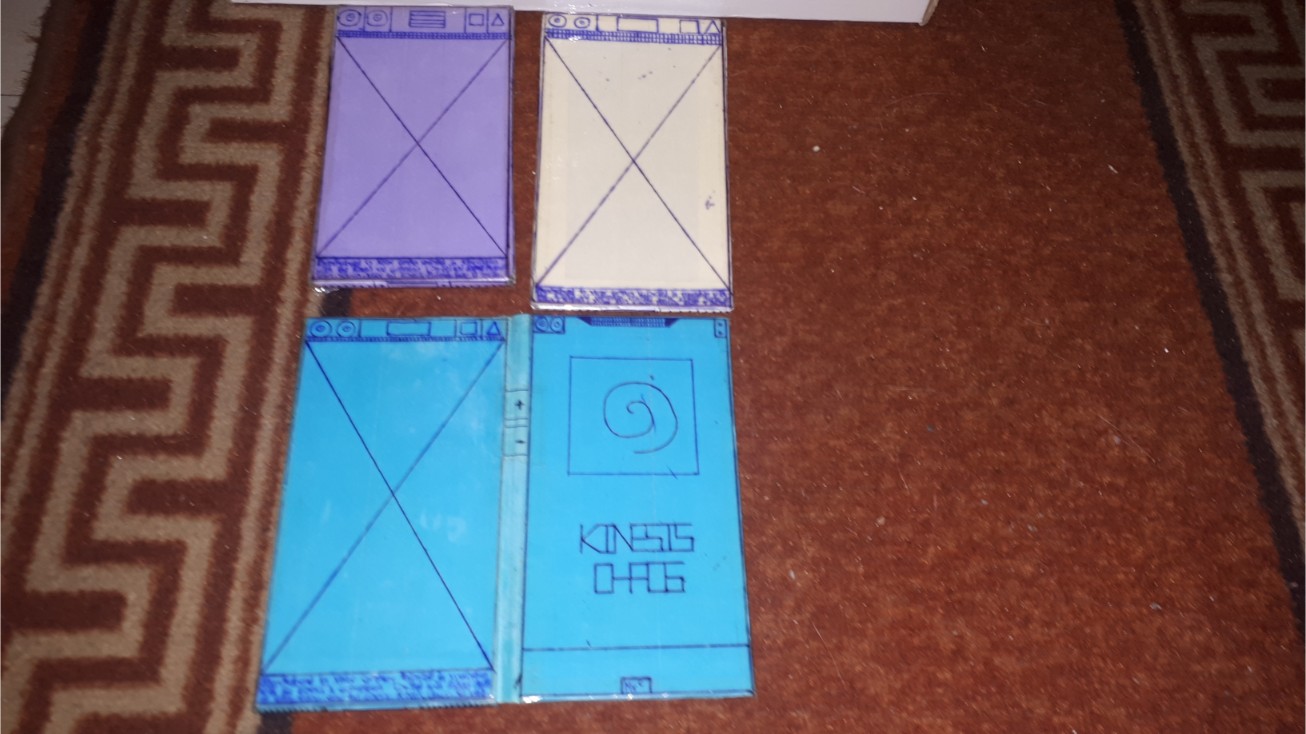
While the Xerox Dream phones diddn’t make big changes to the previous lineup, everything changed with the next 3
phones. Making one of these phones took a minimum of 2 weeks. The first one of the third generation was the Kinesis
Ultimate. Designs were made on paper and everything was planned. 4 cardboard rectangular pieces were needed for its
construction. 2 of them served as the internal boards. Purple colored papers were glued along the sides and on the
faces of the cardboard pieces (except for 2). One face of one cardboard piece was the front screen of the the phone
(with the screen, etc…). On this piece’s back, there were small rectangles (connectors) for connecting the front
components to the motherboard. The next cardboard piece had a secondary Quantum Molecule Power (QMx) processor, some
CPU cores (watercooled), some RAM sticks, internal storage chips, graphics cards and some other things. It also had
complementary connectors to the ones on the back of the first cardboard piece. On the back of this cardboard piece,
there were 2 connectors and a big battery. On the next cardboard piece, there were some more similar components as
the ones found on the second board but with a main Quantum Molecule Power processor. There were also drawings for
the sim card tray (dual sim + micro SD card), capactive power/volume buttons on the sides, headphone jack and speakers.
This was the main motherboard. On its back, there were connectors for the components on the last cardboard piece.
The last cardboard piece was the back of the phone and featured for example, the rear cameras. On the back of this
cardboard piece, there were connectors for the back components to the main motherboard along with the coil to support
wireless charging. When all the interior cardboard pieces were finally designed, the layers and their sides were covered
with adhesive tape and a piece of colored paper bind all the 4 sides together. Finally, the top and bottom colored papers
were glued and designed. The sides were designed too and everything was again covered with adhesive tape. The sides of
the phone had each 2 buttons; a power key, a custom key that could be mapped, a volume up and a volume down key.
These phones also had IR blasters and a charging port. The sim card tray could be popped off and as mentioned, the headphone
jack, microphone(s) and speakers were found on the top/bottom sides of the phones. Then, the Kinesis Prototype 1 was made.
It followed similar designs to the Kinesis Ultimate but it was bigger and had soft-keys, and as it was made using only
2 cardboard pieces, it didn’t have a secondary motherboard. The Prototype 1 was never meant to be more powerful than the
Ultimate. I was just trying to materialise an idea I had.
The last phone I made was intended to be the most powerful one and sure it was. It followed a similar design to the
Kinesis Ultimate and once again, was made up of 4 cardboard pieces. I didn’t make the same mistakes that I did with the
Ultimate this time. It was sure better. The big difference between the Ultimate and the Kinesis Chaos was that the latter came
with a flip cover. The flip cover was really well made using 2 pieces of cardboard. It contained a tertiary Quantum Molecule
Power processor, some more components (RAM, storage, CPU cores, GPU) and a second, smaller battery but the Chaos really didn’t
all of these additional components to beat the Ultimate in all aspects. It was just ridiculously powerful. The flip cover also
had a small screen to display basic information without flipping it. It also had fictional holes for the cameras and front
earpiece. On its bottom, there was a little touch screen which, for example could be used to pick up phone calls or take
photos quickly. The Kinesis Chaos will have a successor; the Kinesis Chaos 2. You’ll find details on its design on this
Instagram post. The last 3 devices also removed the back scanner
as I figured out that the cameras could be used for the same purpose. Thanks for reading!